Table of Contents
Growing herbs and spices for beginners
Freshly picked herbs and spices are undoubtedly the most delicious. Both their flavor and nutritional value are at their prime. Sadly, you will often have a hard time finding fresh herbs and spices at your local supermarket. Their seeds can, however, be found at nurseries, gardening centers, or on the Internet.
Besides saving you some money, you’ll have the freshest seasonings on hand when it’s time to cook. A world of culinary possibilities opens up when you grow your own herbs and spices, thanks to a wide range of flavor combinations.
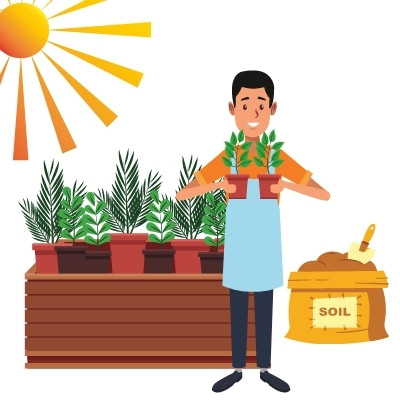
Poor planning and a lack of understanding the importance of setting your plants up for success from the very beginning are common reasons for container gardens to fail.
As gardeners, we sometimes become so excited for the actual planting that we lose sight of all the critical details that have to be in place before even considering sowing a single seed.
A successful container garden is built on three essential elements, and if any one of those is missing, your chances of growing a productive container garden are greatly diminished.
Things may not turn out as expected if you don’t use the right container, the right potting mix, and the right location.
You should not let the lack of garden space prevent you from growing herbs at home. Herbs are among the easiest plants to grow in small spaces. Growing herbs is usually successful indoors in small containers, so long as they’re placed in a spot with appropriate sunlight and have a constant supply of water and good drainage. Furthermore, your home will be filled with the pleasant aroma of fresh herbs all day.
However, growing spices usually requires more effort than herbs. Due to the fact that spices are commonly made from seeds, roots, and rhizomes of plants, they need drying or processing before they can be used in the kitchen.
For instance, developing the flavor of vanilla beans requires a complicated curing process. Similarly, processing cinnamon sticks is a laborious process conducted by hand after scraping the bark of the cinnamon tree.
For this reason, the best spices to grow at home are the spices which can be harvested for their seeds, leaves and berries. As an example, cilantro grows on coriander plants, which produce flavorful seeds at the end of their life cycle. You can pick the delicious leaves all summer long, and harvest the seeds for the season’s spice at the end. Additional great examples can be fennel, dill, and fenugreek, that can all double as both herbs and spices thanks to their easy-to-grow nature.
Herbs and spices life cycle
Plants can be categorized according to their life cycle into three general categories — Annuals, Biennials and Perennials.
- Annual herbs and spices
Herbs and spices that bloom only once and die afterwards. Herbs such as dill, anise, basil, coriander, and chervil are all examples of annual herbs.
- Biennial herbs and spices
Biennial herbs and spices, by definition, are those that survive for two seasons (two years). A couple of examples of biennial herbs are Caraway, Evening Primrose, and Parsley. In the first season, they produce leaves. In the second season, they produce flowers and seeds, after which they die. - Perennial herbs and spices
A perennial herb or spice is one that survives for more than two growing seasons. Many culinary herbs are perennials, including Chives, Fennel, Marjoram, Mints, Oregano, Rosemary, Tarragon, Lavender, Sage, Savory, Thyme, etc. Typically, in the first year, these types of herbs grow slowly, then mature in the second year.
Annuals
- Basil
- Borage
- Chervil
- Cilantro
- Dill
- German Chamomile
- Marjoram
- Nasturtium
- Summer Savory
Biennials
- Angelica
- Caraway
- Celery
- Parsley
Perennials
- Bay Leaf
- Chives
- Lavender
- Lemon Balm
- Lovage
- Oregano
- Mint
- Roman Chamomile
- Rosemary
- Sage
- Salad Burnet
- Sweet Woodruff
- Tarragon

Annuals generally die off with the arrival of cooler weather. However, in temperate or cold climates, if you can provide warm conditions indoors, plants like basil and dill can spend the winter inside and continue producing leaves for longer. Pinch or snip off any flowers as they appear to prevent the plants from seeding and dying. Regular harvesting will help keep the plants thriving for a longer growing season.
Indoor herbs and spice growing essentials
To start an indoor herb and spice garden, you must be aware of the essentials/factors that must be considered. Several factors must be considered, such as container size, sunlight, type of soil, method of planting (seeds, cuttings, or young plants), watering requirements, harvesting techniques, as well as general plant care tips. Nonetheless, the first step to establishing a herb-and-spice garden is knowing what the plant needs and whether you can provide it.
1. Assessing the climate
Several herbs will grow well in an outdoor garden, but you must keep in mind that plant productivity is impacted by climate. It is always recommended to know the growing conditions and climate of a plant’s native habitat. Make sure your home conditions are similar to your plants’ needs.
In Europe and Asia, tarragon, for example, is native to temperate climates, and it isn’t tolerant of extreme cold or heat. It’s important that you protect the plant from excessive heat and frosts when growing your own tarragon. Placing the plant under shade in summer afternoons and mulching the soil in winters can prevent your tarragon plant from heat and cold respectively.
Practice of planting your herbs and spices at the right time of the year will ensure optimal growth and availability throughout the season.
For instance, it is usually best to plant herbs that flourish in the summertime, such as basil, cilantro, and dill, in the spring, once the frost season has finished. However, planting these herbs in fall is preferable in areas with hot climates, as the herbs will produce harvests through the winter.
Gardening is made a little easier with container gardening. If the weather changes, the plants can be brought indoors. They can be placed outside during the season of their preference. A plant’s lifespan can be extended in this way, allowing it to produce harvests well beyond its normal life expectancy. However, gardeners must pay extra attention to container gardening due to its nature.
2. Containers for planting herbs and spices at home
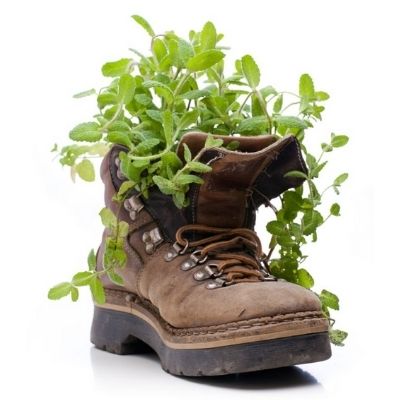
The choice of containers can range from small-medium sized pots, window boxes, hanging baskets, or barrels. Even, colanders and tin cans can be repurposed as containers for planting herbs and spices at home. Don’t be surprised to see glass jars, plastic bottles, water baskets, old tea pots or even egg trays being used to home or kitchen gardening.

Also, the good thing about repurposing common household items is that you can test how a particular herb grows in your home before committing to a home garden and investing money in pots and other tools for indoor gardening.
Nonetheless, size, material, and drainage are the most important aspects of choosing a container.
- Size of the container
Small container
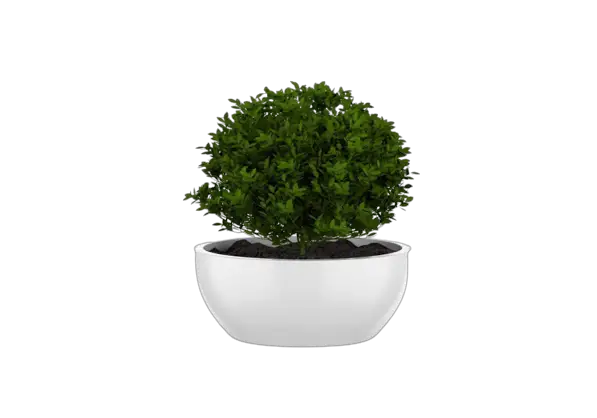

Even though tiny pots look great, they are not conducive to growing many edible plants. For these containers, choose small herbs plants but keep in mind that they will require more frequent watering than larger plants.
Medium-sized container
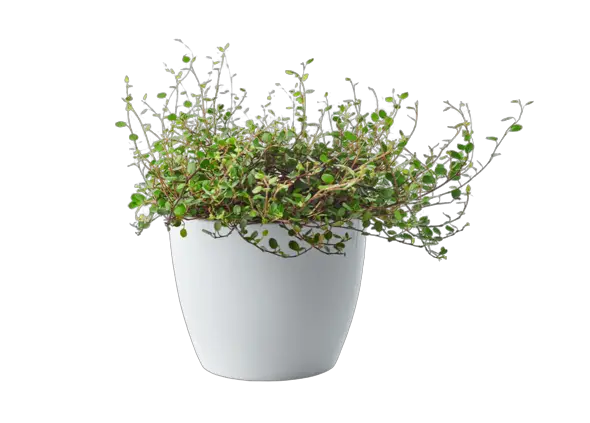

Many spices and herbs will thrive in containers measuring 10–15in (25–38cm) in diameter and the same in depth. You can also grow multiple plants in these types of containers.
Large container
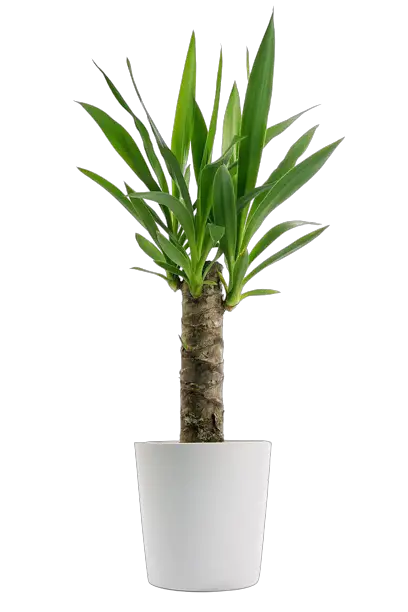

Containers that hold more potting mix and water require less frequent watering, since they hold more potting mix and water.
Choose a container that is appropriate for the size of the plant, as well as the root size and growth habits of the plant. Large or spreading roots may be constrained in a small container, thereby decreasing the amount of moisture, nutrients, and air circulation necessary for a plant to thrive. With a larger container, you need more soil, which will retain water longer, potentially rotting the roots.
- Material of the container
A terra-cotta/clay pot that has not been glazed is ideal for most herbs. Plants that need fast-draining soil or dry conditions need porous container walls that allow moisture to evaporate freely along with ample air circulation.
As well as offering protection from sudden changes in temperature, clay is also sturdy and heavy enough to resist windy conditions.
In contrast, plastic containers, are light and impervious. They’re more suited to plants that don’t mind moisture lingering in the soil.
We have extensively covered “how to choose a container for you indoor plants and kitchen gardening“. A recommended read for an in depth look into types of containers and what to consider for your specific needs.
- Drainage capability of the container
An optimally draining container is perhaps one of the most vital requirements for ensuring healthy herb growth.
Water should freely drain out of the bottom of the container through the drainage hole at the bottom of the container.
We have also covered drainage requirements of a planter/container in the same article “how to choose a container“.


1. You can drill more holes at the base of the container, in case you suspect that the existing holes are not enough.
2. Adding a layer of gravel beneath a container’s soil does not improve drainage, and is even detrimental. The soil will become saturated, and the roots will rot. As an alternative, choose soil that drains well and add compost or perlite to help with drainage for optimal results.
3. Plants in pots with lack of drainage are more vulnerable to fungal diseases.
3. Light requirements for herbs and spices
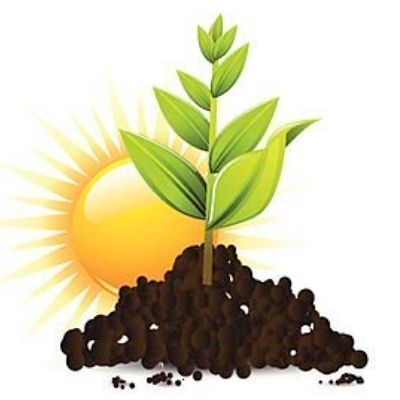

To thrive and produce the best flavor and fragrance, herbs need plenty of direct sunlight. At the very least, their daily dose of sunshine should be about four hours.
If you are planting herbs indoors, place them on a south-facing windowsill. If you are planting them in the garden, place them so they face south, east, or west.
Growing herbs in containers allows you to move them around during the day to get adequate sunlight or shade if required. Consider investing in artificial grow lights if your home does not receive enough sunlight for herbs.
Generally, there are three lights requirements: full sun, partial shade, and full shade.
Full sun – Greater than 6 hours
Partial sun – 4-6 hours
Full Shade – 4 hours
Please read Light requirements for indoor plants and The best indoor plants based on light requirements for an in depth discussion on light requirements for indoor plants. (We have presented a detailed infographic of a house layout and different spots suitable for indoor container gardening)


Sunlight also brings in heat. Without proper airflow, being exposed to direct sunlight during the hottest part of a summer day can cook some plants instead of promoting growth.
Choose a location that allows a lot of natural light, but that can also be shady in some way. A possible solution is to choose a window that is partially shaded with an awning during the day to block the sun, or to place plants on shelves that receive indirect sunlight.
4. Airflow requirements
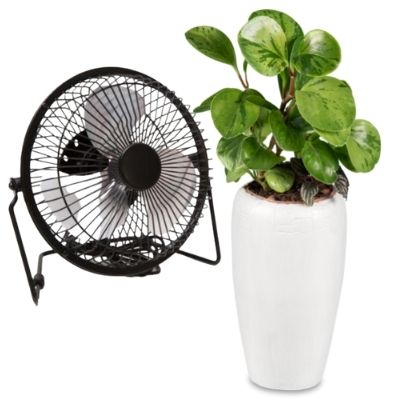

Many people don’t realize the importance of air circulation while growing herbs and spices at home. Poor or lack of airflow induces many problems such as molding seeds, bug infestation on the plants or even no germination.
By mimicking outdoor conditions, air circulation helps plants grow well and minimizes the likelihood of bacterial and pest problems.
If there isn’t much wind on a given day, use a small fan.
It’s especially critical to improve airflow in basements and attics, which can quickly become stagnant.
5. Spacing between plants

An average kitchen space of three feet can’t accommodate twenty different kinds of herbs. Indoor plants need space apart from each other just as they would out in the open or in a raised bed.
The vast majority of indoor plants require at least some breathing room, with the exception of microgreens and shoots (which are harvested during the first stage of growth). Avoiding crowding of plants at a single spot is always advisable.
Spacing between plants is specific to the plant.
6. Soil requirements

Numerous nurseries offer soil-testing kits that can help you determine the drainage capabilities, pH levels, and mineral content of your soil.
Generally, herbs require a potting mix that’s moist (but not wet), well-draining, and nutrient-rich. A well-drained soil is paramount as roots should never be waterlogged.
The heavy clay soil does not drain well and retains water around the roots. This can prevent oxygen from reaching the roots, causing them to rot. A quick draining soil like sandy soil, on the other hand, will dry out the roots.
A mixture of clay and sand, known as a loam, is generally recommended for growing herbs; however, specific needs vary from plant to plant.


For Garden soil :
To test the drainage characteristics of your soil in the garden, dig a hole 10-12 inches deep. Fill the hole with water and observe the drainage of water. Ideally, the water should begin draining within 10 or so seconds.
Within half an hour, if there is still water in the hole, that means that your soil does not have the required drainage capabilities. On the other hand, if your soil drains too fast, it can’t retain enough moisture for plants to survive.
No matter how heavy or sandy the soil is, for improved drainage mix in a compost or other organic matter appropriate for the soil’s conditions. Clay soils should be reworked to increase their porosity, while sandy soils should be reworked to improve water retention. In the garden, you can plant herbs in a raised bed or on a small hill to achieve improved drainage.
How to make your own potting mix
A further advantage of container gardening is that potting soil is used instead of garden soil. Since containers provide no natural drainage like gardens do, potted plants require high amounts of water and drainage-friendly soil. As potting soil is designed specifically for container growing, it does not contain any ground soil.
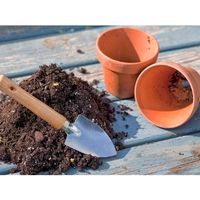

While being soft, light, and loose, a suitable potting soil should drain freely while also nourishing the roots. Planting mixtures contain ingredients such as bark, peat moss, lime, humus, compost, perlite, and vermiculite. Instead of peat moss, some potting mixes also contain coir fiber or cocopeat.
Herbs and spices growing in containers require fertilizer as well as container herbs have their roots enclosed in the pot. Be sure to check your herb plant’s requirements so you know which fertilizers to use.
7. Growing plants from seeds
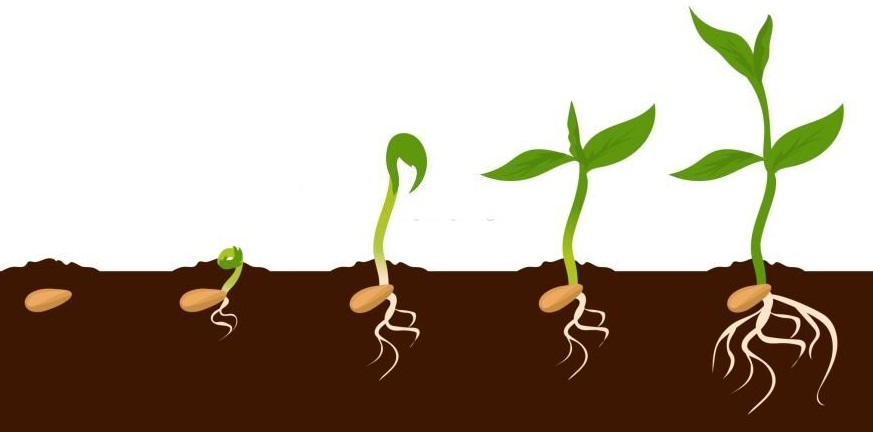

Growing herbs at home can be most conveniently accomplished by purchasing young plants from a nursery. The nursery typically offers a wide variety of herbs and spices saplings and you can check the health of the plants before purchasing. However, the downside of this is that you end up with a raised expenditure for your home garden.
Start with seeds if you want to save money. Usually, you will find detailed instructions on how to sow and take care of the seeds on the seed packet.
Normally, seeds should be sown indoors at least three months before being planted outdoors in the garden. You will give your growing season a boost by allowing your seeds time to germinate and grow into seedlings.
It usually takes two to three weeks for plants to germinate, though it can vary. Typically, Perennial plants undergo a dormant period each year during the winter. The dormancy period helps them complete their seasonal cycles and bloom each spring. The outer coating of dormant seeds is hard and impervious for as long as the dormancy lasts.
It often takes a special treatment for them to sprout and break out. We categorize them as stratification or scarification treatments.
Stratification Process
By stratifying seeds, we mimic the weather conditions the seeds would experience in their native environment.
Until this season is over, they remain dormant and will only sprout at the end of the season.
To simulate a winter, stratification is usually accomplished by creating a cold, moist environment.
Eg . Seeds can be chilled in a refrigerator for two to three months by soaking them in moist sand, peat, or in a paper towel. During the winter months, stratification can also be achieved by burying the seeds in the ground. This process prepares the seeds for germination by softening their hard coat.
Scarification Process
Dormant seeds are scarified by scratching or sanding their surface to penetrate their hard coating.
Another easy way to trigger germination is by soaking seeds overnight in water. Some seeds need to be soaked before they can be planted.
Seedlings can be transplanted into starter pots once they have germinated. Ideally, these should be potted in healthy potting soil and kept at temperatures that are optimal for growth.
Herb seeds require different conditions, so be sure to follow your seeds’ instructions carefully. Upon reaching a healthy and vigorous state, the seedlings can be transplanted to their permanent spot in the ground or to a designated container.


The roots of some seedlings are very deep, and they do not transplant well. Hence, these seedlings should be moved sooner rather than later, before the roots have fully developed.
Generally speaking, you should wait to transplant a plant after two sets of leaves appear. Verify that the last frost has passed and that the soil is warm enough for your new plants.
8. Growing plants from root divisions and stem cutting
Other than propagating herbs and spices using seeds, you can also propagate plants using parts of already existing plants. This can be achieved by two methods : Stem cuttings and Root division.
Stem cutting
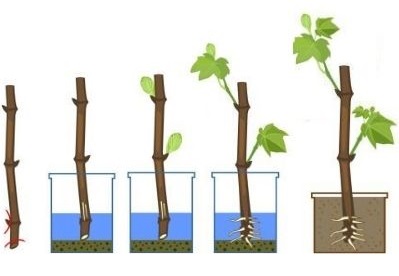

Plants are grown from cuttings by snipping a branch from a healthy plant and then soaking it or planting it in soil till it develops its own roots.
The method works well for shrubs and woody plants such as rosemary, sage, and thyme.
From just below a growth of leaves, cut a healthy, firm stem using garden shears or a sharp knife.
The length of your cutting should be between two and six inches.
You will plant the lower third of the cutting in sand or potting mix to establish roots, so remove the leaves from this portion.
During this process, the cutting might need rooting hormone, and after the cutting has been sown, it will need plenty of water.
Root division
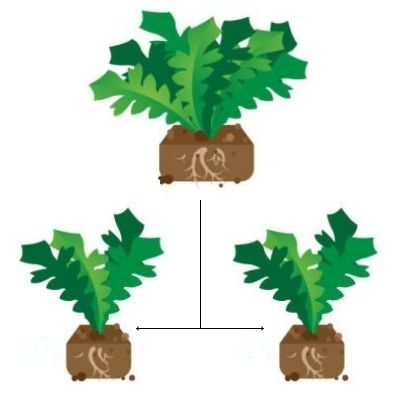

Typically, divided-root methods work best for perennials that grow in bunches, e.g. chives, mint, lemon balm, oregano, and tarragon.
Ideally, the plants should be between three and five years old and near the end of their lifespan.
Dig up a plant that has formed a cluster of roots, preferably about eight inches in length.
Split the roots in bunches of about two inches with the help of a garden fork, shovel, or very sharp knife.
You can either replant them in the ground or in a potting mix with nutritional content.
9. Watering the plants
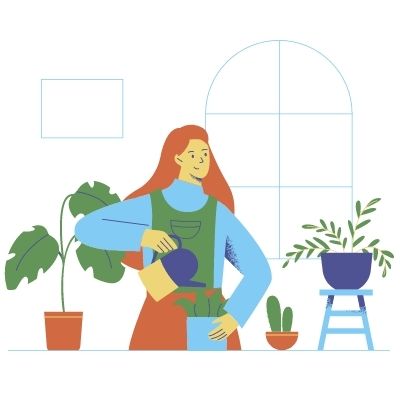

Water-stressed plants dig their roots deeper into the ground to seek water. However, Container-grown plants don’t have that opportunity, so a steady watering schedule is crucial.
Summertime requires more frequent watering than wintertime. Ensure you use potting mix that drains well and meets the moisture requirements for your herbs.
A bit of drought is not a problem for most herbs, but their needs differ depending on the plant, climate, humidity, and soil. Some plants need the soil to remain moist, some plants might need the surface soil to dry out before the next watering session. On the other hand, some plants might require the soil to completely dry out before they require another watering session.


A general thumb rule you can follow is to put your finger into the soil. A soil that feels dry deeper than two inches deep may need to be watered. You should water your container plants until water starts draining out of the drainage openings so that they receive enough moisture.
10 . Pests and pets


Growing herbs and spices indoors comes with the perks of protecting the plants from outside critters such as rabbits, chipmunks or squirrels. However, sometimes people miss the idea of their house pet becoming a “mini-godzilla” to their “home indoor garden’s Tokyo“.
Small precautions like shutting the basement door (in case you are growing herbs and spices in the basement), choosing counters instead of floors, or opting for a room which can be sanctioned off can be a helpful practice.
You can also use wire screens, plastic mesh or even large fancy rooks to act as a barrier between your plant and the pet.
Mice, can also become a problem in some cases. Despite never having mice problems before, fresh seeds can be enticing to critters like mice, and even houses that had never had mice problems before might now experience them.
These issues often arise in places like unfinished basement areas during colder months.
You can counter this problem in two ways – Avoid planting any new plants in the months between September and April. OR mouse proofing the area.
Harvesting the Herbs
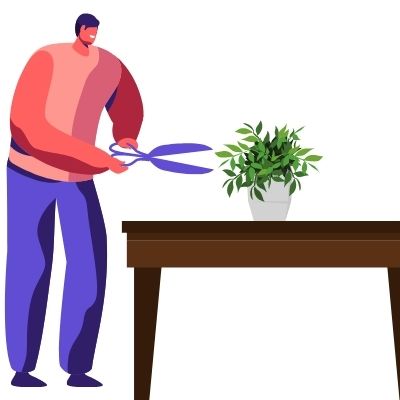

The leaves of herbs are cut either by hand, scissors, gardening shears, or sharp knives. Depending on how tough the stems are and how they are harvested, the tool chosen may differ. For instance, basil leaves can be easily plucked by hand, whereas fennel stalks and lavender stems require shears or a knife.
Herbs can be harvested all through the growing period, which is a very effective way to increase the amount of growth throughout the season. At a time, prune up to one-third of the plant’s foliage. Prevent seeds from developing by regularly removing flowers.
Just before the plant flowers, the leaves reach their peak flavor. This is the most ideal time to harvest a full herb harvest that can last you through the winter. After the season is over, cut down or dig up the whole plant when collecting foliage. Plants that are annuals ought to be dug up, however perennials should be pruned and left to grow back next year.
Harvesting the spices

Unlike herbs, spices seeds are harvested after the spice plant has flowered. After flowering the spice plant produces seeds. In case of seeds, before the plant drops the seeds on the ground, the seeds should be collected.
Cover the plant section with a paper bag and prune the stem from the base to collect seedpods or flower heads. Next, turn the bag upside down to collect all of the seeds.
In addition to seeds, spices are also available as rhizomes, bark, and berries. Specific instructions are provided in the spices kitchen gardening section.
After the herbs and spices are harvested, we can now move on the next step of how to store herbs and spices.

