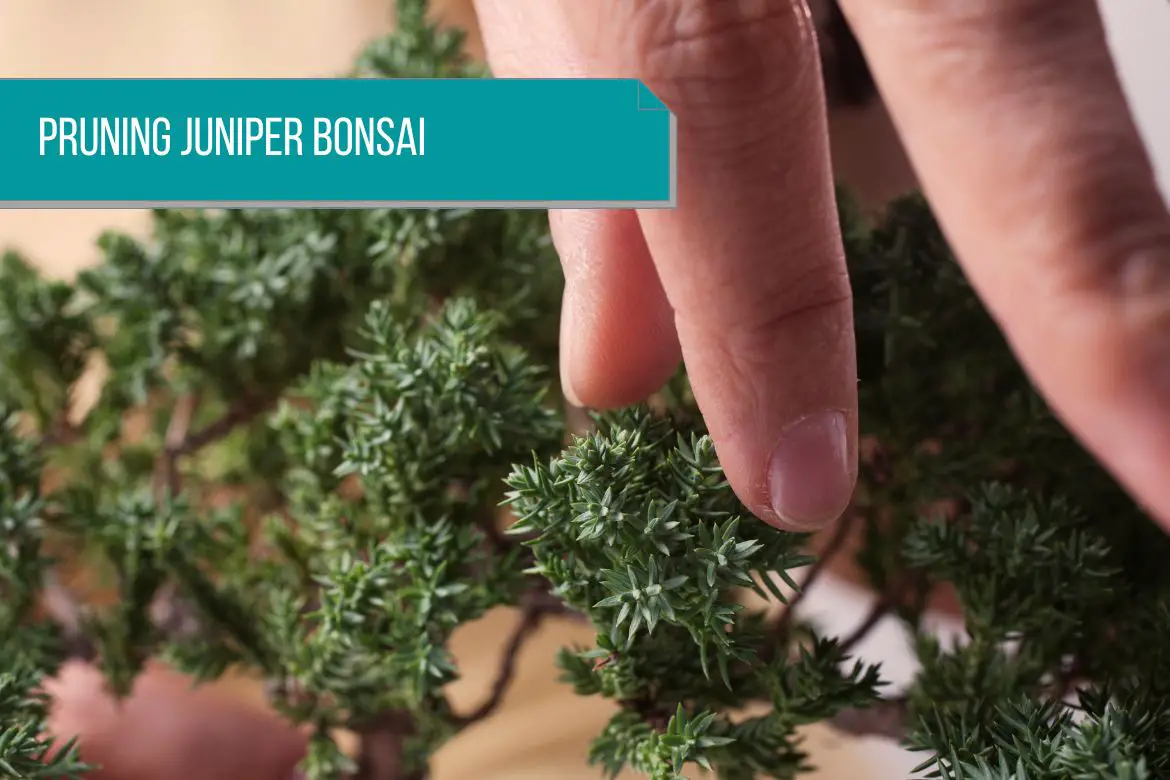
Junipers have a rapid growth habit. Hence, regular pruning is a must to keep the juniper bonsai in the desired shape.
Throughout the growing season, conifers like these produce new shoots, and a few soft tips can be pinched almost every day as well. However, make sure that you only start the pruning and pinching routine when you see that the tree is developing healthy young growth.
Refer types of Juniper bonsai trees to know more about all the juniper trees which can be used to make a bonsai tree.
Also read : All the tree species that can be used to make bonsai (and their care guides)
Before moving onto the the pinching and pruning juniper bonsai, below are the few things you need to consider and finalize:
- Finalize the ‘front view‘ section of your tree. This will give you a clear idea of what to remove and what to keep.
- Also have a clear idea of the height of your juniper bonsai. Finalizing the height and thickness of the trunk will also help you in deciding the intensity in which you wish to prune juniper bonsai tree.
- Identify and choose the primary, secondary and tertiary branches of your juniper bonsai. This step will help you in achieving the desired ‘ramification‘ you have in your mind.
* Ramification : This basically means, the way in which the leaves, the branches, the roots, and the trunk of a bonsai are shaped that gives the bonsai its final appearance. As a bonsai maker, this is one of the most important aspects of the creation process. Also included in this is the way you are training the branches and controlling the foliage growth of your bonsai so that it mimics as closely as possible the natural look of the tree.
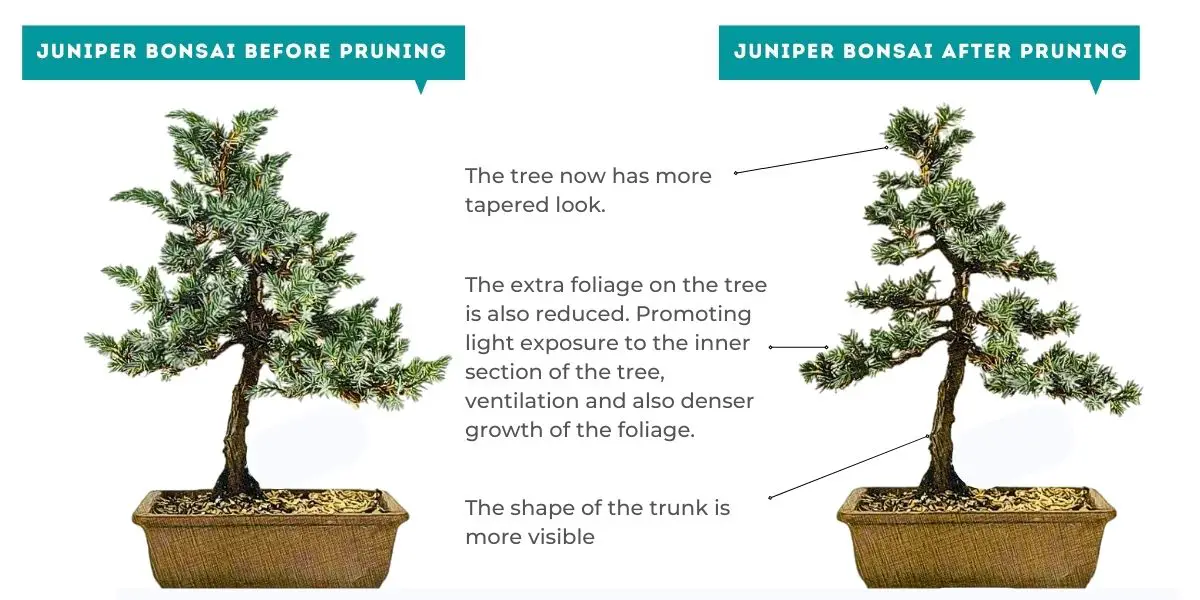
Before we get into the pinching and pruning techniques of juniper bonsai, lets define few ‘terms‘ (and their significance).
(1) Primary, secondary and tertiary branches
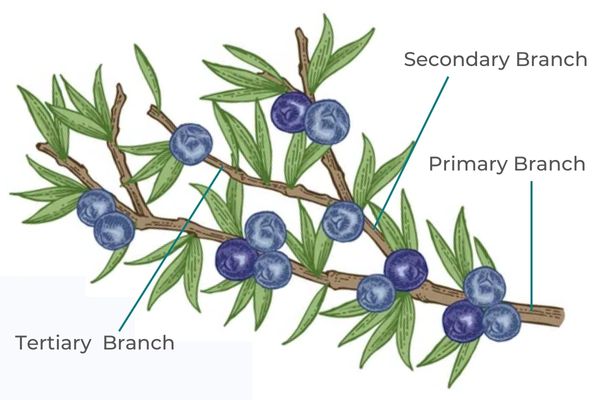
- As stated earlier, you should choose your primary branch wisely. Then use a concave cutter to remove the rest of the branches from the trunk. You can remove the branches from the lower section of the trunk. As a result, you will be able to show off the texture of the bark and the shape of the trunk on your juniper bonsai more effectively.
- Once you have selected your primary branches, now its time to shortlist your secondary branches. Branches that are emerging from the primary branch are called secondary branches. One key rule you can follow is, try and keep a uniform distance between all the secondary branches. The ‘internode‘ distance plays a key role in how your bonsai looks.
Few more things to keep in mind while selecting your secondary branches are, (i) ensure that you have chosen branches which align with the ‘flow’ of the bonsai, (ii) ensure that the thickness of the branches looks the same, (iii) primary branch should look thicker than the secondary branch, and (iv) remove the branches which are cluttered together or originating from the same spot. - As your Juniper bonsai tree matures, you will start seeing new branches emerging from the secondary branches. These new branches are the tertiary branches. Achieving a good tertiary ramification on your juniper bonsai should be your final objective. Once you have achieved this, most of your work will be cut. Now you will only be required to periodically prune the foliage and extension shoots.
Apply the same branch selection and pruning principles which you will apply for secondary branches.
Extension shoots and how to deal with them :
There is a noticeable difference in size and color between extension shoots and the surrounding shoots. Extension shoots are much paler and thicker.
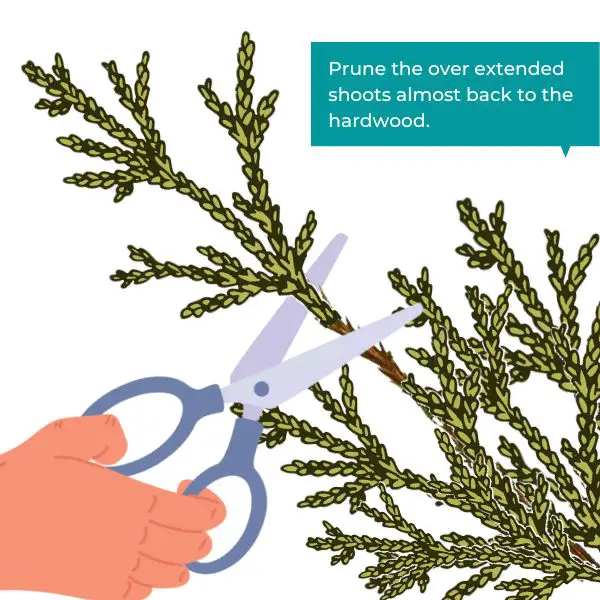
Extension shoots should be pruned hard, down to last year’s level or even further. Prune back to a healthy pair of side shoots.
(2) Internodes
As you can see from the figure below, internode is basically the region between 2 consecutive nodes (from where new growth emerges).

While considering the internodes on the branches, try and keep 2 things in mind: (i) Try and shorten the distance between the nodes and, (ii) try and keep the distance between the nodes consistent.
(3) Taper of the Juniper bonsai tree
Finally, while pruning, consider the taper of the tree. Taper of the tree consist of few pointers:
- The width of the trunk at the base of the bonsai should be thickest. As the trunk goes up, the thickness should reduce.
- The primary branches of the tree should be thicker than the secondary branches & secondary branches should be thicker than the tertiary branches.
Juniper Bonsai Pruning and Pinching
Now that we have a better idea of things to keep in mind before starting the pruning of a juniper bonsai tree, lets get into the details of how to prune the branches. (In case you need more information on pruning tools, please refer bonsai tools guide and bonsai tools care and maintenance)
A Juniper has either scale-like foliage pressed tightly to its shoots, or a sharp needle foliage , which are generally borne in groups of three along each internode.
Scale like Juniper :
- Sargent’s Juniper (Juniperus sargentii)
- Chinese Juniper (Juniperus chinensis)
- Meyer’s Juniper (Juniperus Squamata ‘Meyeri’)
- San Jose Juniper (Juniperus chinesis ‘San Jose’)
- Dahurian Juniper (Juniperus davurica)
- California Juniper (Juniperus californica)
- Creeping or Prostrate Juniper (Juniperus horizontalis)
Needle Like Juniper :
- Needle Juniper (Juniperus rigida)
- Common Juniper (Juniperus communis)
- Hornibrook Juniper (Juniperus communis ‘Hornibrookii’)
- Foemina Juniper (Juniperus chinensis ‘Foemina’)
- Japanese Garden Juniper (Juniperus procumbens)
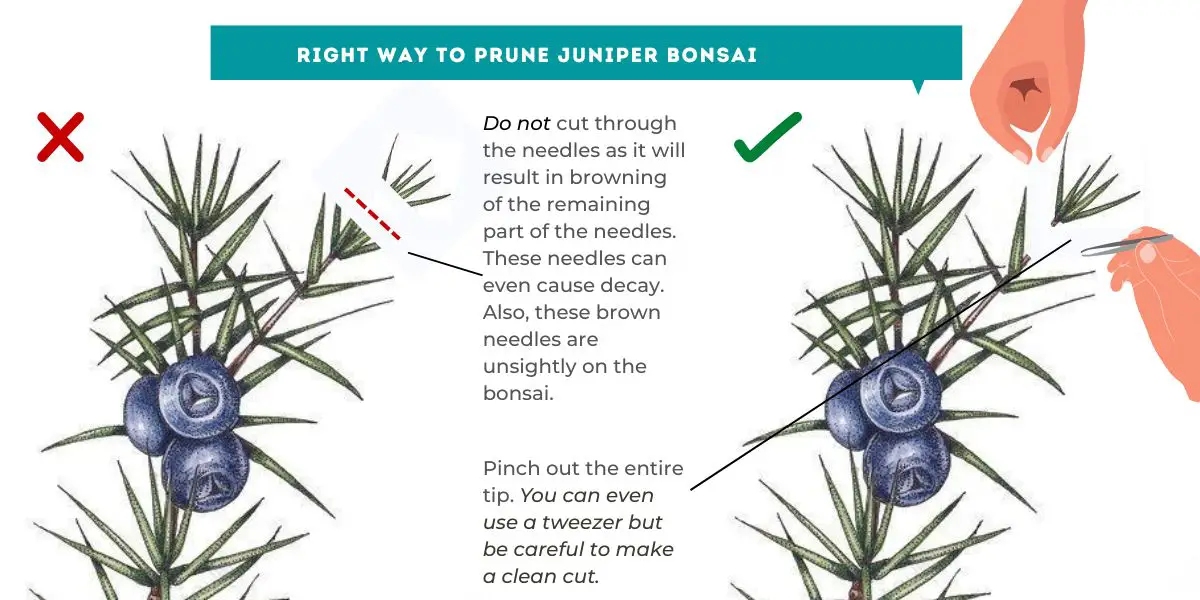
When you pinch out the tips of the shoots, instead of plucking them straight out, twist them and gently pull them until they break off.

As a result of stress, junipers with scale-like foliage produce few needle-like leaves. These are called ‘juvenile foliage‘.
It is best to pinch back all shoots bearing juvenile foliage in their first season. Or instead of removing the whole shoot, you can simply remove the leaves if they are very few in number.
A shoot bearing juvenile foliage that is pinched in its second year will wilt and die rather than producing any new growth.
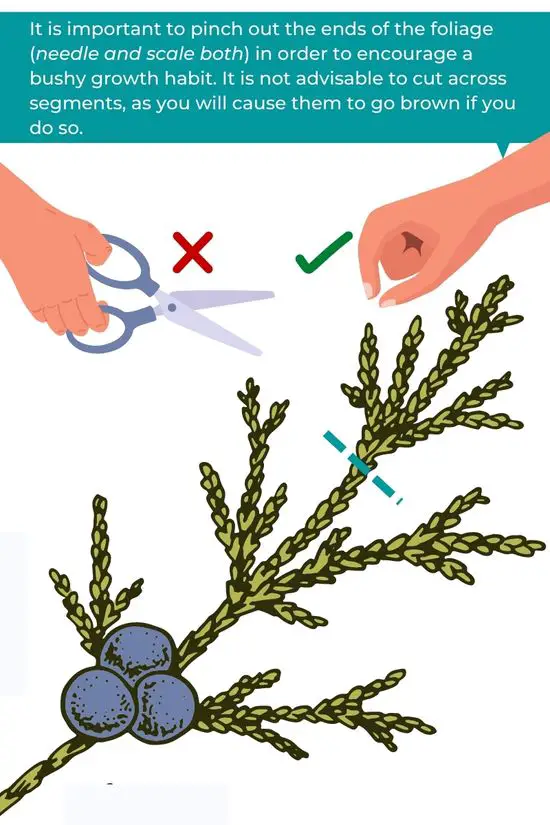
In pinching (also known as finger pruning), buds are removed or new shoots are shortened using your fingers, most commonly using your thumb and forefinger.
In order to force the tree to bud further back on the branch, you can pinch out the new shoot or tip. Hence, rather than allowing the bonsai tree to grow upwards and outwards, this practice increases the density of the foliage.
Trees are naturally motivated to grow to their maximum size. As the tree grows larger, it also tries to extend its root system so that it can extract as much nutrition from the soil as possible.
After each pruning session, make sure to remove the dead and pruned needles / scales from the surface of the bonsai soil and from the inner dense foliage. This will reduce the chances of any bonsai pest and disease. Read best practices to keep your bonsai pest free for more details.
Pinching Scale Juniper
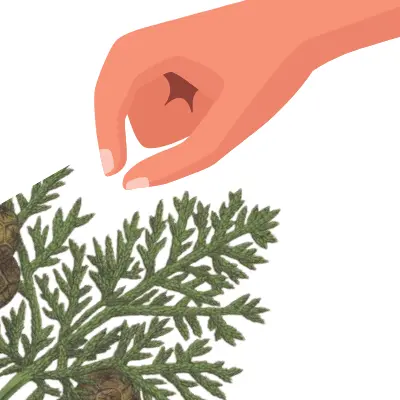
- Compared to needle Junipers, scale Junipers tend to develop buds faster. Hence, the new growth should be pinched often in Spring and Summer.
- Scale Junipers can be easily pinched by watching the outline/profile of the tree. You should pinch off the buds when they extend past the outline of the bonsai
- As before, this will direct energy toward lateral growth, further down the trunk and branches.
- Occasionally, you may discover that some shoots have grown long enough to be too hard to remove. Using scissors will be necessary to cut these tough buds.
- In this process, called thinning, you will ensure a healthy tree with no unsightly dead patches.
Pinching Needle Juniper
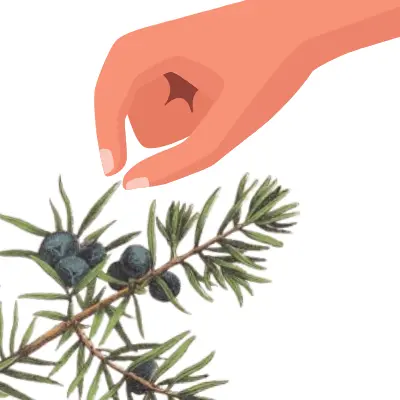
- Spring is the time to pinch out new growth from needle Juniper bonsai tree.
- On mature needle juniper bonsai trees (trained trees that have already taken shape), pinch the growth as it emerges.
- On younger needle juniper bonsai trees (less established) wait until the buds have formed and strengthened before pinching them out.
- It is best to pinch new growth from stronger areas of your tree. Essentially, this will allow the weaker areas to catch up with the stronger ones.
- By the appearance of a growth, you will be able to tell whether it is strong or weak.
- Weak growth will lack color and will look pale, where strong growth will have vibrant colors and will appear healthy.
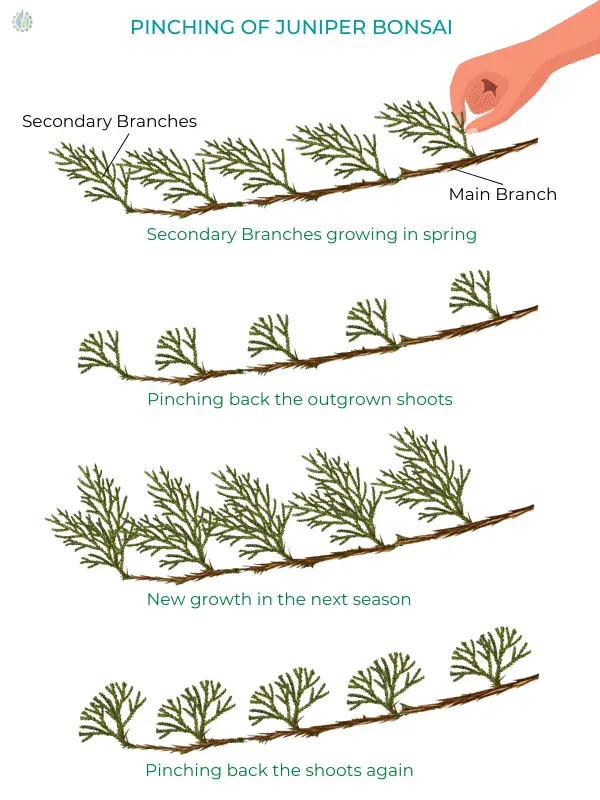
By pinching out newly formed unwanted growth on the outer side, you can redirect this energy towards the growth of the trunk and rest of the branches.
A symmetrical canopy is one of the primary goals – there should be no empty spots!
Pinch out new shoots as they appear throughout Spring, to ensure the foliage is balanced across the tree.
If you have some bare patches on the branches, don’t worry. These will disappear over time as a result of your training.
By preventing new bud growth in areas already covered in foliage, you are signaling the tree to grow buds elsewhere.

